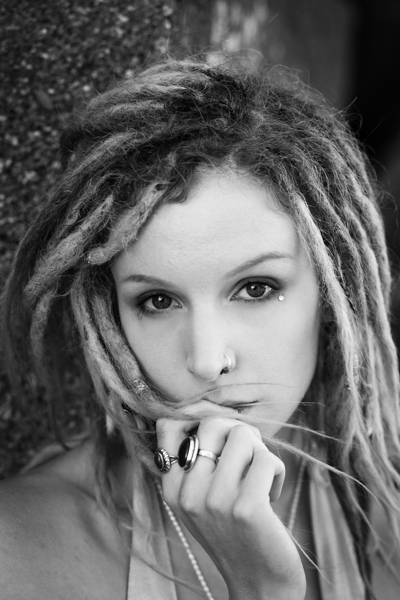
InstaWidget

Recent Update

How to Pose for Pictures: 10 Tricks Every Girl Should Know

0 comments
Picture-Pose_Feature
1. Use your tongue. 
This is one of best tricks out there—and the weirdest. It might feel strange, but by pressing your tongue on the roof of your mouth while smiling is an effective way to help avoid the dreaded double chin, as it elongates your neck and your jawline. We’ve tried it, and it works! It also works for Heidi Klum and Renee Zellweger, who are fans of this trick.
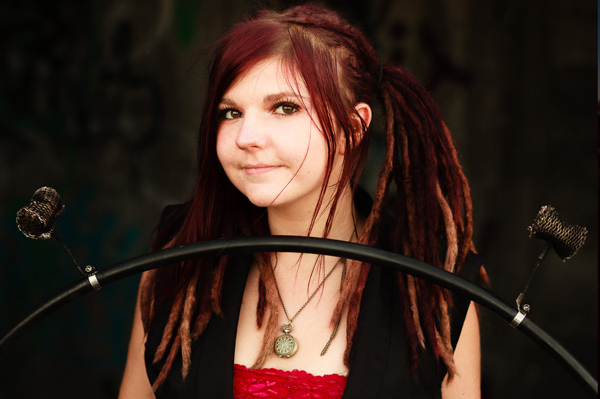
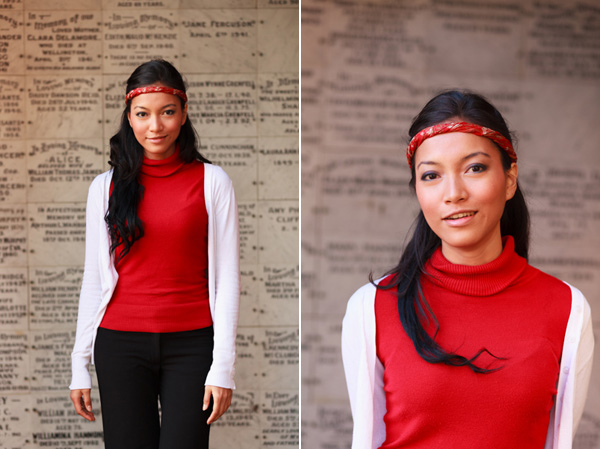
2. Angle your face.
Unless you’re being snapped by a professional portait photographer, it’s key to avoid direct head-on shots. Why? Because there’ll be an absence of shadows, which could make your face look wider, larger, or slightly discolored. Instead, stand slightly sideways and tilt your chin a little bit upward or a tad downward. From there, be sure to look at something just above your natural line of sight.
how to pose How to Pose for Pictures: 10 Tricks Every Girl Should Know
When your head is tilted slightly up or down, it’s more flattering than getting snapped head-on.

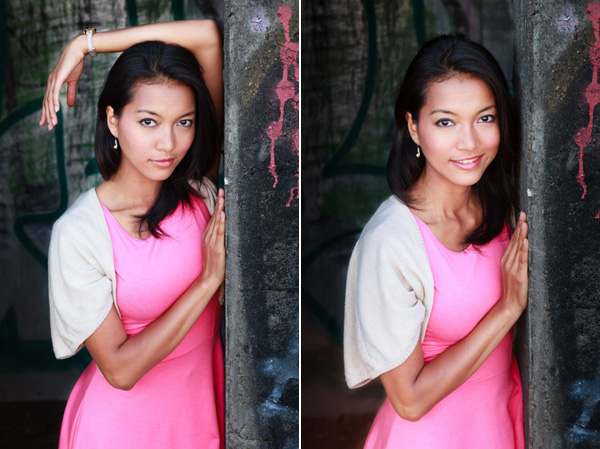
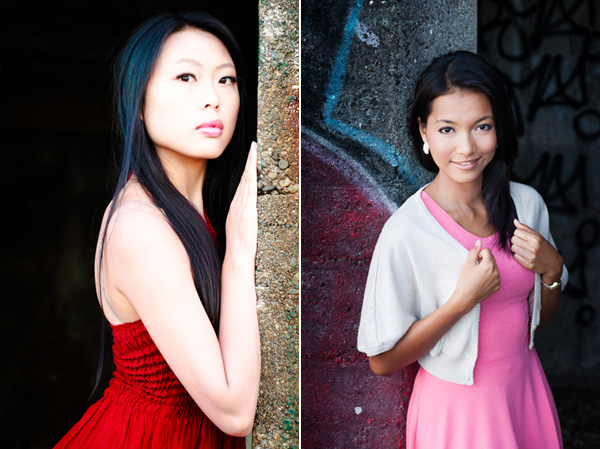
3. Twist your body and position your arms
Ah, the old red carpet trick: Position your body 45 degrees and put the arm closest to the camera on your hip. Then plant one foot slightly in front of the other, point your toe to the camera and place your weight on your back leg.

Ever wonder why every celebrity poses with her camera-facing arm on her hip? It’s because that particular move ensures that her upper arm isn’t smooshed against her body making it look flattened (read: larger.) If you find the hand-on-hip pose to be a bit forced, try holding your arms out from your sides ever so slightly.
paris hilton posing how to pose look better in pictures
Love her or hate her, Paris Hilton’s a posing poster girl.

model How to Pose for Pictures: 10 Tricks Every Girl Should Know
She looks a little less pose-y than Paris, but she’s still harnessing the power of the hand-on-hip move.

5. Cross your ankles.
If you’re being shot head-on (maybe for a street style snap?) cross your legs, starting at the calf. This stance will make your hips look narrower and your legs look longer, plus it looks a bit more casual. It’s worth noting that the pose also works when you’re sitting. Although it’s always preferable to stand in pictures, if you happen to be on a chair or a couch when someone comes at you with a camera, sit up straight and cross your legs at the ankles. It’ll be more flattering than not doing anything with those stems.
New York str RS14 6124
Cross those ankles for a more flattering shot.

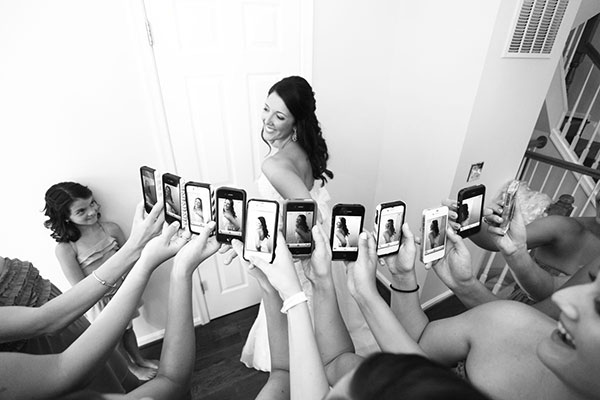
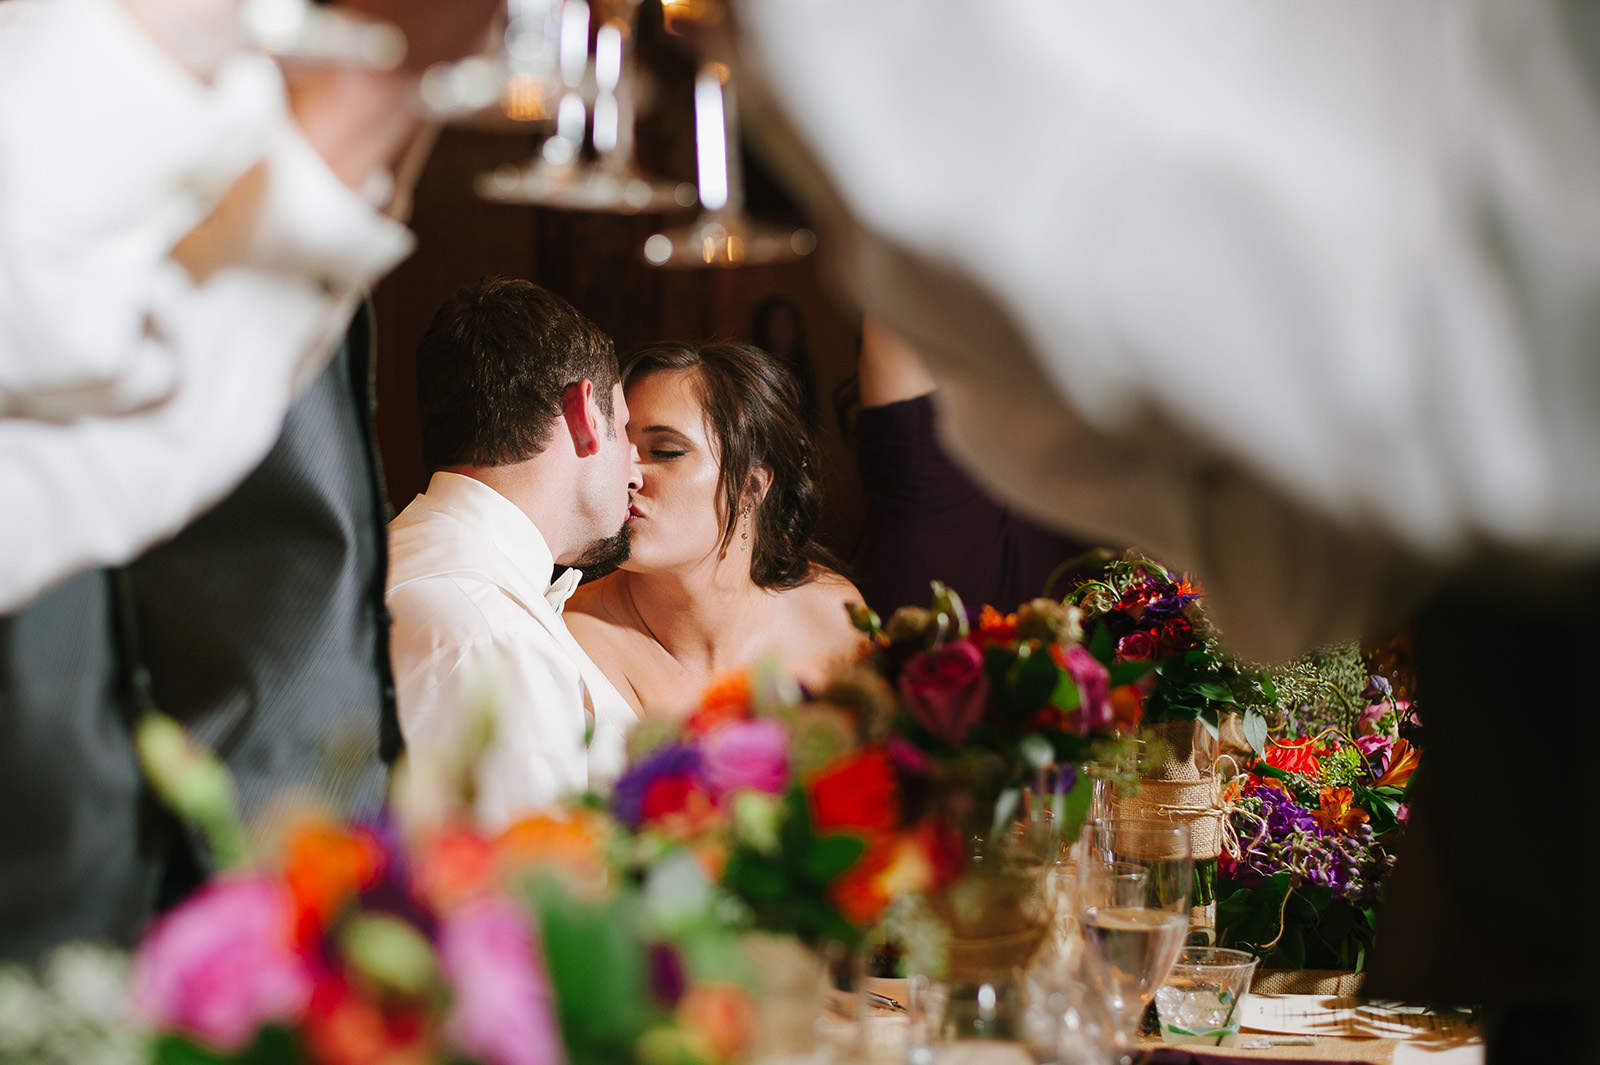
6. Don’t follow the group.
The key to a stellar group shot? Not all doing the same pose. Not only is that hokey (hello, standing in height order on prom night) but everyone is shaped differently, so the viewer’s eye will naturally gravitate to who looks best in the pose, not the picture. Instead, be sure to stand comfortably without mimicking the people directly next to you.
Naeem Khan bks M RF14 0271

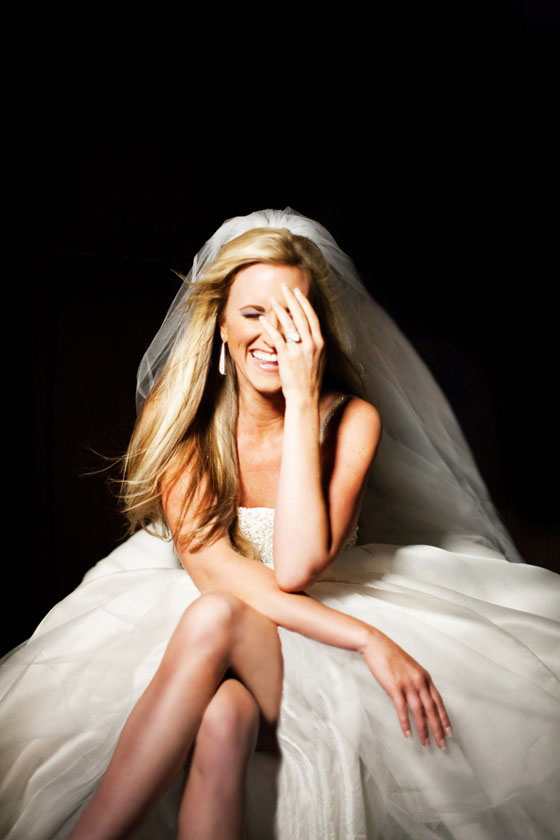
7. Learn to smile for the camera.
Smiling is a tricky thing when it comes to photos. Too big, and you look silly, but none at all can make you look broody or angry. The solution? The ‘natural’ smile you so often do when the camera’s not on you.

Smiling too wide on purpose will cause your face to tense up, your eyes to squint, and your cheeks to puff out, which aren’t the benchmarks of an attractive photo. Instead, take a beat to relax your face and open your mouth  slightly, so that your lower lip matches the curve of your upper teeth. This is universally flattering, and allows you to decide how much teeth you want to show. Not a fan of smiling with teeth? Learn to smize (smile with your eyes, for the uninitiated.)
One thing to note: When you smile naturally, the area around your eyes tends to crease a bit, which reads as much more sincere than stiffly smiling just with your mouth.

zSMILE2
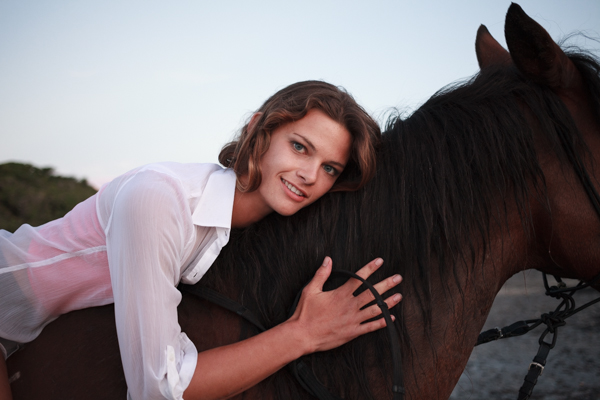
A genuine smile can be spotted a mile away–and always makes for a more flattering photo.

zSMILE1
zSMILE
8. Practice good posture.
You’ve heard it 1,000 times, but standing up straight really does make a difference. Not only will it elongate you in photos, but it gives you an aura of strength and confidence, which is naturally alluring.

9. Understand proportion. 
It’s a basic rule: Whatever is closer to the camera will appear larger.

zclosefar How to Pose for Pictures: 10 Tricks Every Girl Should Know
zznearfar How to Pose for Pictures: 10 Tricks Every Girl Should Know
10. Loosen up.
Unless you’re a professional model, odds are that most of the photos you find yourself in are fun, casual shots with friends. As much you think “posing” for these types of pictures will make you look better, the fact remains that loosing up and having a little fun will almost always make for a more flattering snap. Since you’re not trying as hard, there will be less room for error.

cute photo How to Pose for Pictures: 10 Tricks Every Girl Should Know
zzzfun How to Pose for Pictures: 10 Tricks Every Girl Should Know

Best Wedding Photos of 2013

0 comments
25. Because one photo of that first moment in your gown just isn’t enough:
2014-01-02-25bridesmaidswithiphonescinematicbydavidm.jpg
Photo Credit: CINEMATICbyDavidM
24. Sunlight peeking through the trees adds such a magical element:
2014-01-02-24sunlightthroughtreesweddingphotolightedpixels.jpg

Photo Credit: Lightedpixels
23. Looking for a creative guest book idea? Set up a photo area, and provide a chalkboard and chalk for guests to leave you photographed messages:
2014-01-02-23itgetsbetterwithagejessehollandphotography.jpeg
22. Snap a photo of the bridesmaids showing how they met the bride:
2014-01-02-22howyouknowthebridekatyhallphotography.jpg
Photo Credit: Katy Hall Photography
21. This beautiful bridal portrait is also a sweet and fun way to show off the ring:
2014-01-02-21beautifulbridalportraitheidielnoraphotography.jpg

Photo Credit: Leslee Mitchell / Dress by Heidi Elnora
20. We love the lighting in this incredible rainy wedding photo:
2014-01-02-20incrediblelightingweddingphotohofferphotography.jpg
Photo Credit: Hoffer Photography
19. This might be the cutest ring photo we've ever seen:
2014-01-02-19dogwithweddingringsjeffcookephotography.jpg

Photo Credit: Jeff Cooke Photography
18. Simply beautiful! We love the romance in this autumn wedding photo.
2014-01-02-18beautifulfallweddingphotosanyakhomenko.jpg
Photo Credit: Sanya Khomenko
17. This wedding photo in the rain is so stunning:
2014-01-02-17weddingphotoinrainunpluggedphotography.jpg

Photo Credit: Unplugged Photography
16. We love the relaxed romance of this sweet wedding photo:
2014-01-02-16relaxedromanceweddingphotoelizabethmessina.jpg
Photo Credit: Elizabeth Messina
15. Display a meaningful quote above your ceremony aisle:
2014-01-02-15meaningfulquoteaboveceremonyaisleamandapatrice.jpg
Photo Credit: Amanda Patrice
14. Pure romance! We love the lighting in this stunning photo:
2014-01-02-14sweptawaybylovejanisratnieks.jpg
Photo Credit: Janis Ratnieks
13. We love the pure bliss on this groom’s face upon seeing his bride for the first time on the big day:
2014-01-02-13firstlookkatekylejoeelariophotography3.jpeg

Photo Credit: Joe Elario Photography
12. This beautiful photo might just have you wishing for rain on your wedding day:
2014-01-02-12rainydayweddingphoto2unpluggedphotography.jpg

Photo Credit: Unplugged Photography
11. This bride's excitement makes us smile:
2014-01-02-11excitedbridepostceremony.jpg
10. Who says your flower girls need to be under a certain age? These grandmas are having a blast:
2014-01-02-10grandmaflowergirlsgenevieveleiper.jpg

Photo Credit: Genevieve Leiper
9. We love this beautiful shot through the church’s stained glass window:
2014-01-02-9throughchurchstainedglasswindow4eyesphotography.jpg
Photo Credit: 4Eyes Photography
8. An incredible shot of an incredible dress:
2014-01-02-8incredibleshotincredibledressrawsiiphotography.jpg

Photo Credit: Rawsii Photography
7. We love the country-chic vibe in this beautiful photo:
2014-01-02-7countrychicweddingportraithummingbirdbridalandevents.jpeg

Photo Credit: Gerhard Gross
6. We love this unique twist: The bride entered the ceremony by herself, then met her parents halfway down the aisle:
2014-01-02-6uniqueceremonyentrancestephengreenphotography.jpg
5. Adorable must-have photo with your maid of honor and best man:
2014-01-02-5musthavephotomaidofhonorbestman1photographybybritton.jpg
Photo Credit: Photography by Britton
4. Talk about a dramatic sendoff! We love this couple’s fiery exit:
2014-01-02-4fieryweddingsendoffnathandeschphotography.jpg
Photo Credit: Nathan Desch Photography
3. We love this magical way to use sparklers in your wedding photos:
2014-01-02-3magicalsparklerweddingphotocaptivatingweddings.jpg
Photo Credit: Captivating Weddings
2. The sunlight adds such a lovely, serene feel to this sweet photo:
And 2013's Photo of the Year is...
1. Take advantage of the weather on your wedding day — whatever it may be!
2014-01-02-1magicalsnowweddingphoto.jpg
Photo Credit: Still Frames Photography
Tell us: Which photo is your favorite?

How to Make Autofocus Work in Extremely Low Light

0 comments
Have you ever been in a situation where light conditions were so poor that your camera would completely refuse to autofocus, with the lens constantly going back and forth “hunting” for focus? I am sure you have, since it is a very common problem. Sometimes you want to photograph your loved one in candle light, or snap a shot of your child blowing out candles on a birthday cake. Or perhaps, you are dealing with a DJ that decides to turn off all lights on the wedding dance floor, killing your chances of getting any shots in focus, even when you are fully prepared with flashes to light up your subjects. That’s exactly what happened to me and Lola last weekend when we were shooting a wedding. Lola came up to me and asked if there was anything she could do to make autofocus work again and I thought of an old trick that really does work when dealing with such situations.
Autofocus in Low Light
NIKON D3S + 70.0-200.0 mm f/2.8 @ ISO 800, 1/160, f/2.8

What you will need

To make this work, you will need a modern speedlight or a commander that has a built-in “AF assist” red beam. Many Nikon speedlights like SB-600, SB-700, SB-800, SB-900 and SB-910 come with AF assist capability, so any of those should work. The Nikon SU-800 flash commander will also work (as long as you don’t need flash on your camera).

Autofocusing in extremely low light

So how would you make autofocus work in very dim situations? Here is a step by step process:
  1. Mount a speedlight or a commander on your DSLR camera’s hot shoe
  2. Change your focus mode to AF-S (Single Servo / Single Area AF)
  3. Half-press the shutter release or the AF-ON button and you should see the red lights on the speedlight activate
  4. A red beam will be projected onto your subject, which will allow your lens to immediately acquire focus
This method of focus acquisition is called “Active Autofocus” and it works by measuring the distance between the camera and the subject. Since the red beam quickly falls off with distance, it only works on relatively close subjects within 15-20 feet (which is plenty for most situations). It is a much more accurate method compared to the white “AF Assist” lamp on your DSLR, which is not only limited to even shorter distances, but it also has accuracy problems and is often blocked by lens hoods. All this is explained in detail in my “autofocus modes explained” article.
So, this is what I basically did at the wedding. With the Nikon SB-900 speedlight mounted on the camera, I changed the focus mode to AF-S (Single Servo), then told Lola to release the shutter as soon as the camera acquires focus (since people were dancing and constantly moving). Since the camera will not continuously track subjects in AF-S mode, releasing the shutter as soon as focus is acquired usually works pretty well. Unfortunately, there is no way to continuously track subjects with the red beam, so you will be limited to AF-S only. If you have your camera set up to only shoot when the subject is in focus in AF-S mode, I would recommend to change this behavior, especially if you need to focus and recompose. On Nikon DSLRs, go to “Custom Setting Menu” -> “Autofocus” and set “AF-S priority selection” to “Release”. Note that once you make this change, your camera will always fire in AF-S mode, even when the subject is not in focus.
Wedding Flash Photography #1
NIKON D3S + 70.0-200.0 mm f/2.8 @ ISO 800, 1/80, f/4.0
Please note that using your speedlight’s red beam to focus will limit the number of autofocus points you will be able to use.

But I do NOT want to use flash!

What if you do not want to use flash and still want to focus accurately using the active red beam? The good news is that you don’t have to. All you need to do is set up your flash to only use the AF Assist lamp and you can turn off flash completely. The bad news is that this setting is only available on high-end speedlights – lower-end speedlights like Nikon SB-600 and SB-700 do not have this particular capability. However, there are some workarounds available to stop flash from being fired. Aside from setting flash to lowest power and rotating the flash head backwards or blocking it with something, you can follow the instructions provided further down below.
Here is how to disable flash on the Nikon SB-900 and SB-910 speedlights:
  1. Turn speedlight on (ON position on the switch)
  2. Press and hold the “OK” button for a couple of seconds until the Menu comes up
  3. Scroll down until you get to the “AF” submenu and press OK (under “M ZOOM” and above “STBY”)
  4. Select “AF ONLY” and press OK
  5. Press the first top left button to exit the menu
Here is the screenshot from the Nikon SB-910 manual that illustrates the “AF ONLY” setting:
Nikon SB-900 SB-910 AF Assist
Once you do this, the flash unit will only be used for assisting in autofocus and flash will not fire unless you change this setting back. The speedlight LCD will now indicate “AF-ILL ONLY” and the rear “ready” light will turn off.
If you prefer not to mess with the flash menu setting, there is another way to turn flash off, but it requires that you continuously hold a button on your camera. On most Nikon DSLRs, you can program a button (such as the Function or the AE-L/AF-L buttons) to disallow flash. You can do this by going to “Custom Setting Menu” -> “Assign Fn button” (or you can pick “preview” / “AE-L / AF-L”) -> “Press” -> “Flash off”. This can be painful to use for many shots, as you would need to hold the programmed button every time you need to turn off flash, but some people don’t mind.

Nikon SB-600 and SB-700 workarounds

If you own a lower-end Nikon flash like SB-600 and SB-700, you can employ several workarounds to turn off flash. First, you can make the above-mentioned configuration change to one of the function buttons. Second, you can set the SB-600 or the SB-700 in commander mode, then turn off the flash by switching the master channel (M) off (double dash).
Wedding Flash Photography #2
NIKON D3S + 50.0 mm f/1.8 @ ISO 400, 1/160, f/2.5
One of our readers asked how he could accurately focus on dance performers in dim conditions at close distances, obviously without using flash. My response was to use the above technique, which would work really well, as long as the dancers don’t mind occasional lights coming from the speedlight.
Hope you find the above technique useful – we encourage you to try this out and experiment. Please let us know how it works out for you in the comments section below!

Beginner Tips for Posing People with Confidence

0 comments
How to pose models
The reason posing can create problems is because inexperienced models will look to you for direction. If your model is waiting for you to tell her what to do and you freeze up or don’t have any decent ideas you will struggle to create good photos. It’s up to you to take charge and tell the model how to pose. The key is preparation – you need a set of poses you can suggest to the model.

Before the shoot

Here are some points to think about before the shoot:

What kind of shoot is it? The posing requirements for a family portrait are very different than a fashion shoot. You can think about posing once you’ve decided what type of photo you are going to create.

Look for inspiration online. Chances are you have a few favourite photographers you follow on websites like Flickr and 500px. You will find some good poses in their portfolios. Download your favourites to your smartphone (or use Pinterest to create a mood board, covered in more detail in my article How to Plan the Perfect Portrait Shoot). Then you have something you can show to your model. Don’t try and commit the poses to memory – you will forget them under pressure.

Match the pose to your model. This is important. You’ll see some wonderful poses in fashion magazines. But many of them need a professional model to carry them off. Your model may not be able to do that, especially if she has a different body type than the people in the magazine.

Buy the Posing App. It gives you over 300 poses that you can access on your smartphone. The best way to use it is to select five to ten and make them your favourites. Then you can show them to your model so she understands the what you’d like her to do.

How to pose models

Screen shots from the Posing App. The line drawings are easy to understand and follow.

During the shoot

No matter how experienced or inexperienced your model is, here are some tips to help you find the perfect pose during the shoot:

Build rapport. This is essential. If your model likes you and sees what you are trying to achieve she will work harder. If you talk to her about things she likes you will see more life in her eyes and get better expressions, including natural smiles. She will be more relaxed. If your model is tense, you are going to struggle to get natural looking portraits. Take the pressure off her and bring it back on yourself. Assure her that if the photos don’t work out that it’s your fault, not hers. Build her confidence.

Look for natural expression. As you talk to your model you will notice natural expressions and mannerisms that you can use. Don’t be afraid to say “hold that pose” or “do what you did just now again”.

How to pose models
I noticed the model had a interesting mannerism so I asked her to repeat the gesture. This portrait is one of her favourites

Adapt poses. When you suggest a pose, such as one used in another photo or from the Posing App, treat it as a starting point, then adapt it to suit your model. If she looks unnatural in a certain pose, then adapt it so it suits her body and the clothes she’s wearing.

How to pose a model
The pose on the left is one I found in the Posing App. For the second portrait I asked my model to drop her left arm so I couldn’t see it. Don’t be afraid to tweak poses, sometimes a small change makes a big difference.

Simplify. Keep everything as simple as possible. That applies to composition and the clothes and jewellery worn by your model. If she has too much jewellery on, ask her to remove some. It will improve the composition. If you’re struggling to find a good full-length pose, move in closer and shoot from the waist up, or do a head and shoulders portrait. The background will go more out of focus, and there will be less of the model in the photo.

How to pose models
Simplification in action. The closer you crop, the easier it is to pose your model. This is a good technique to use if you are struggling to make a certain pose work.

Pay attention to detail. Especially hands, which often look better side on to the camera. Look at photos where the model’s hands look elegant or are otherwise well posed, and ask your model to do the same. Check her hair to make sure stray strands aren’t blowing across her face or eyes. Look at her clothes to make sure they aren’t wrinkled or creased in a strange way.

Find something for your model to lean on. This makes it much easier to find a natural looking pose.

How to pose models
Two different ways to use a wall to give a model something to do. The Posing App has lots of poses for leaning.

Use props. If the model has something to hold or otherwise interact with, it gives her something to do. If she is having fun you’re more likely to get a great expression.

How to pose models
The model in this photo is into hooping. Using the hoop as a prop gave her something to hold and added interest to the portrait.

How to pose models
I suggested the model bring her horses along to the shoot. The horses are a natural prop and her interaction with them led to photos like this one.

Over to you

Do you have any tips for our readers about posing models? What has worked for you? Tell us about your experiences in the comments.

Choosing Black And White

0 comments
You must forgive that this is merely the thought process of a hobbyist, rather than a tutorial from an expert. In a world awash with blinding, over-saturated colour photos, plenty has been written on this subject in response, but I felt it might help some readers (especially those just starting out in photography) to elaborate on my decision-making process and reasons for rendering or shooting an image in black and white (B+W). Your rationales may be different, of course, but by articulating mine it might help an understanding of what makes black and white images so appealing.
1-La-Tour-Eiffel
Rest assured I absolutely love colour, and when I first started shooting eons ago I was somewhat indifferent, perhaps even a little averse, to B+W. Colour was everything, and even the simple juxtaposition of primary colours in an image was satisfying enough.
2-Shaftesbury-Theatre
For some images, colour is either part or all of the subject. A beautiful sunset, for example, doesn’t look very spectacular de-saturated of its colour. Nor do richly colourful plants or flowers. But, as I have mentioned in previous articles, stripping colour away from the right image can deconstruct its components to emphasise their shapes, textures and light, and each of these alone can form the subject of the image regardless of what they describe within it. Perhaps even the mood of the scene can change in the absence of colour.
3 Zagreb
Revealing the inter-tonal relationships or light and shadow within an image can evoke a different response or appreciation from the viewer than if the image is in colour. Colour can thus be a distraction from or a mask for such relationships. B+W is also versatile enough to apply to almost any subject, be it landscape, street, wildlife or portraits.
4 Jena
Whenever I take an image now, I almost always ask if the colour adds anything to it. Is the colour necessary or expendable to the image, and would the image therefore be just as, if not more, effective without the colour in it? I’ll usually shoot in colour with a view to rendering in B+W afterwards, but on occasion I’ll use one of the Art Filters on my camera and shoot directly to B+W in-camera. This allows me to see what the result could look like, and if it’s not to my liking, my camera (Olympus EM-5) generously creates an original colour RAW file alongside it so that I may adjust that on my own in post.
5 St Paul's Cathedral
(SOOC JPEG from the camera’s B+W Art Filter)
With time one learns to ‘see’ beyond the colours of a scene, switching them off in the minds eye. One can then determine if an image would work in B+W before making the shot, and this opens up many more possibilities to our shooting experience. Below is such an example. A simple shot taken from a bridge of a guy walking down the street, and one I took knowing I wanted to render it in B+W later. He is framed by some shadow and with some deep colours from the foliage and phone box. Not a particularly interesting shot.
6
But with the colour removed and rendered B+W, it becomes more about the shadow frame and the contrast between the light and dark, emphasising the man’s place in the centre. He is also partially framed by his own dark trousers and shadow. Arguably still not a very interesting subject, but perhaps rendered in a more interesting way without the distraction of colour. Seeing the shadows and the frame it created are what inspired me to think of a B+W rendition; then all I had to do was wait for someone to walk into the frame.
7
Another example below, taken on the same day, with a view to rendering in B+W later in post. Again, just a random, uninteresting shot of a woman walking through a passageway on London’s Strand. But the contrasting areas of light and shadow gave me the idea for B+W here.
8
And with the colour removed, this contrast between light and shade is emphasised. The random pedestrian now becomes something of a focal point as the intersecting light and shadow seems to lead the eye towards her.
9
Here’s an example with a more specific intent. My friend wanted a photo of herself inside this temple.
10 Petworth Temple
In colour it’s not a very interesting shot to me, but in B+W I can use the shadow from the pillar to lead the eye to her. With some selective curves adjustment and dodging and burning, the contrast in black and white render her more starkly to the viewer’s eye as the focal point in the image.
11 Petworth Temple
B+W often has connotations of something old or historical, and to that end it can be used to evoke a bygone era. Many of the shots I take in historical buildings will be rendered in B+W for this very reason. Both externally…
12a Bodiam Castle
…and internally.
13a The Vyne
Additionally, mood and atmosphere can also be affected by B+W. When I found the ruins of this fortress atop a hill in Croatia an eerie mist was descending upon it.
14 Samobor Fortress
Atmospheric enough, but then removing the colour made it seem even more desolate and mysterious to me.
15 Samobor Fortress
This shot below of Westminster Palace from the South Bank was taken in the rain. I rather like the colour version; it has areas of primary colours and light playing of each other and balancing the image (in my view). The diffuse lighting and shiny wet surfaces allude to the mist from the rain.
16 Westminster from South Bank
Now without the colour, I think it has a little more atmosphere, with the light areas breaking up a somewhat eerie scene.
17 Westminster from South Bank
One of the commonest reasons for rendering or shooting an image in B+W is to hide a dreary or featureless sky, and I’m not immune to that reason. I like to shoot on nice days with clear skies, but bad weather lends itself to B+W photography. I took a couple of friends on a photowalk around St Paul’s Cathedral a while ago and the sky was a dull grey. So I used the B+W Art filter on my camera to shoot this silhouette of the cathedral, exposing for the light areas to deepen the blacks (SOOC JPEG).
18 St Paul's Cathedral
Below is how it would have looked like otherwise (processed from the RAW file). Dull sky and dull image. The B+W above is far more dramatic and atmospheric.
19 St Paul's Cathedral
In contrast, you might use B+W to make a sky more dramatic, especially where there is an interesting cloud pattern. In the shot below, the sky is already the subject of the image, with the train giving a horizon to anchor the shot.
20 Canary Wharf
Without the colour, the sky looks more dramatic to me and trails my eye down to the silhouette of the train.
21 Canary Wharf
With architecture, B+W is often more effective at emphasising the geometry and shapes of a building. I have also tilted this image to take the perception bias away from the building and onto the lines and shapes leading the eye into the shot. A slight curves adjustment to deepen the blacks and some dodging on the cylinders help too. (I also removed the distraction from the bottom left corner.)
22 City Of London
22a City Of London
Even with simple details, B+W can draw out details and textures, as in this headlight of my…. ahem…. someone’s Jaguar F-Type.
23 Jaguar F-Type
24 Jaguar F-Type
I had discussed my attempts at fine art B+W landscapes in a previous article, but cityscapes lend themselves to this treatment as well. This long exposure of the Shard in London appeals to me in colour, but in B+W it seems to have more of a fine art gravitas, if I can put it that way.
25 Shard
26 Shard
In terms of processing, I use the B+W tab in Lightroom and then selectively move the colour sliders around in the HSL/Color/B&W tab below (as described in a previous article). I’ll also dodge and burn to emphasise the subject, or apply a curves adjustment to increase contrast. If I shoot in colour first then I always shoot RAW, as this gives me far greater latitude in exploiting as much tonal range in the scene as I can. Processing JPEGs, you may find there are more artefacts and obvious demarcations between the tones. The EM-5, however, makes pretty good B+W JPEGs in camera using its Art Filter.
Of course, much of this is my subjective perception, and you may have your own take on rendering or shooting in B+W. But perhaps this may articulate a few of my thoughts on the subject for some people who are still as tentative as I used to be in making B+W images. Thank you for reading.
 

I Am Model Design by Insight © 2009